Home Improvement How-To's: Removing Wood Floor
|
Think twice before
tearing out a wood floor. You can easily replace a few badly damaged
boards, sand away wear and scratches, and apply a shiny new finish –
for a fraction of the cost of new flooring. And if you want to install
a different material, you can save time and effort by putting down
underlayment and laying the new flooring on top of it. That said,
here's how to proceed. |
||
|
SKILL
SCALE Easy
TIME REQUIRED
MATERIALS |
||
| STEPS | ||
|
|
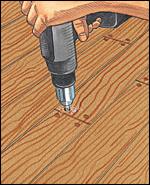 |
Before prying up plank flooring, bore out any screw plugs and remove the screws underneath. With some plug flooring, the plugs are merely decorative and nails are the only fasteners. |
|
|
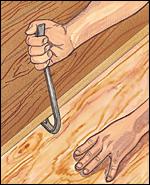 |
Insert a pry bar under the first floorboard and force it up. If there's not enough room for the pry bar, cut out a section of the first board with a circular saw. Remove the cut section, then insert the pry bar into the opening and pry up the rest of the board. |
|
|
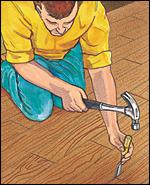 |
Proceed across the floor, prying up one board at a time. Work down the length of each board, placing the bar directly under the blind-nailing positions. If the wood has been glued down, use a chisel to cut through to the bottom of each piece, and tap it loose with a hammer. |