Home Improvement How-To's: Build a Ground Level Deck
|
Decks are a perfect area for outdoor
entertaining and outdoor relaxing. The style of deck you choose to
build determines how you use your deck, as well as how you build it.
Although similar in appearance, different decks can require different
construction techniques. You will see how the deck was assembled, why material choices were made, and the approximate time it took to do the work. Use this example to help you plan your own deck. |
||
|
SKILL SCALE Hard
TIME REQUIRED TOOLS
MATERIALS |
||
| STEPS | ||
| 1 |
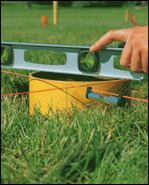 |
Batterboards and mason's string lines were used to lay out footing
locations for a deck that is approximately 8 feet wide and 10 feet
long. Six holes for 8-inch-diameter footings were dug with a posthole
digger. Each hole is 12 inches deep. There is no frost line to deal
with since this is a freestanding deck. Tube forms were used to level
the footings about 1 inch above ground level. Approximate time for a novice (with a helper) to lay out footing locations, dig holes and level tube forms for this deck: 5-7 hours.
|
| 2 |
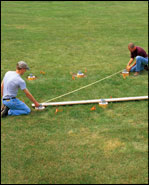 |
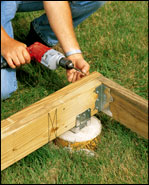
Six
60-pound bags of ready-mix concrete were mixed in a wheelbarrow. Post
anchors for 4x4 posts were attached to the footings after the concrete
cured for 48 hours. The anchors were aligned with a long straight
board. Diagonal measurements were checked to square the anchor
positions. Approximate time (not including curing time): 3-4 hours
|
| 3 |
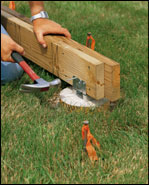 |
Beams were
made from double 2x6s. They were attached in the post anchors. A
1/2-inch-thick pressure-treated shim was installed between the beam
and one side of the anchor at each footing. The anchor is 3 1/2 inches
wide and the beam is 3 inches thick. Approximate time: 2-3 hours.
|
| 4 |
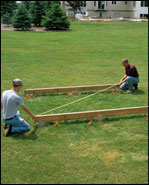 |
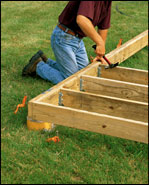
Beam
alignment was checked and adjusted as necessary to make certain beams
were square.
|
| 5 |
 |
2x6 rim
joists were attached to the ends of the beams. Angle brackets were
installed to provide additional support for the corner joints. Approximate time: 1-1 1/2 hours.
|
| 6 |
 |
Inner 2x6
joists were attached to the beam faces with joist hangers. Approximate time: 3-5 hours.
|
| 7 |
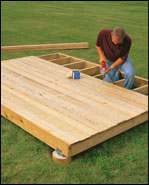 |
2x6 decking
was installed perpendicular to the joists. Decking was fastened with
deck screws. Ends of boards hang over edge of deck and will be trimmed
to length after installation. Approximate time: 1 1/2-2 hours.
|
| 8 |
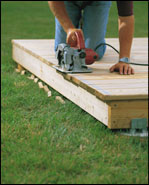 |
A chalk
line was snapped to mark a straight cutting line. Decking was trimmed
to length with a circular saw.
Approximate time: 1/4-1/2 hour. Total approximate time for this ground-level deck:
|