Home Improvement How-To's: Fix Leaky Sink Strainers
|
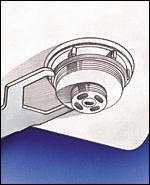
The sink strainer
assembly connects the sink to the drain line. There's a bead of putty
that goes under the lip of the strainer, and it's a very common place
for leaks to occur. Your goal is to take the assembly apart, put in
fresh putty, and tighten everything back up. Remember: there are quite
a few nuts, washers, and gaskets to this assembly. Keep them in their
correct order when you reassemble everything. Old washers and gaskets
should be replaced. Take the old ones with you when you shop for
replacements. |
||
|
SKILL
SCALE Easy
TIME REQUIRED
TOOLS
MATERIALS |
||
| STEPS | ||
|
|
 |
Unscrew the slip nuts from both ends of the tailpiece with slip joint pliers. Disconnect and remove the tailpiece from the strainer body and the trap. |
|
|
 |
Remove the big locknut with a spud wrench. You may need to get things going by tapping on the lugs with a hammer. Unscrew the locknut, then remove the strainer assembly. |
|
|
 |
Remove the old putty from the drain opening by scraping it off with a putty knife. If you're using the old strainer body, clean off the old putty from under the flange. You should also replace the old gaskets and washers. |
|
|
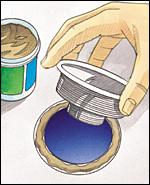 |
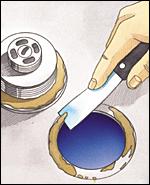
Apply a bead of plumber's putty to the lip of the drain opening, making sure there aren't any gaps. Press the strainer body into the opening. From under the sink, place a rubber gasket, then a metal or fiber friction ring, over the strainer. Reinstall the locknut and tighten it, then reinstall the tailpiece. |